Windows Live Movie Maker Tutorial
Contents
- Startup
- Importing Content From a File
- Capturing from a DVD or VHS
- Editing Your Content
- Exporting Your Video
Overview
Windows Live Movie Maker is a free program that can be used on Microsoft Windows as part of the Windows Live Essentials package. It can allow you to edit video clips from digital cameras and camcorders, as well as videos downloaded from the internet. It can be used to combine clips from a variety of sources into a single video clip. It can also be used to capture from DVD or VHS, but for this, you will require the hardware available in the Educational Technology Center computer lab.
For more information on Windows Movie Maker, please visit the Microsoft’s Getting started with Windows Movie Maker page.
For an in depth video tutorial on using Windows Live Movie Maker, see the Lynda.com tutorial.
Open Windows Live Movie Maker. If you do not yet have Movie Maker installed, you can find it by going to http://windows.microsoft.com/en-us/windows-live/essentials-home (or by searching for “Windows Movie Maker” in Google), and clicking Download now. Simply follow the installation instructions to install Windows Movie Maker.
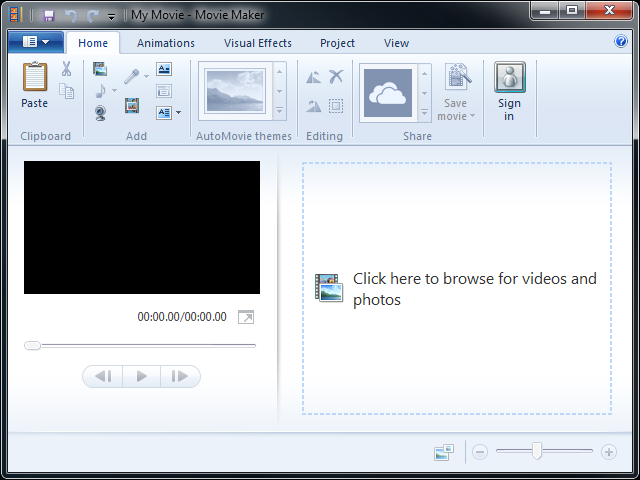
Once you’ve opened Movie Maker, you should be presented with the program window, which should look something like this:
Importing Content From a File
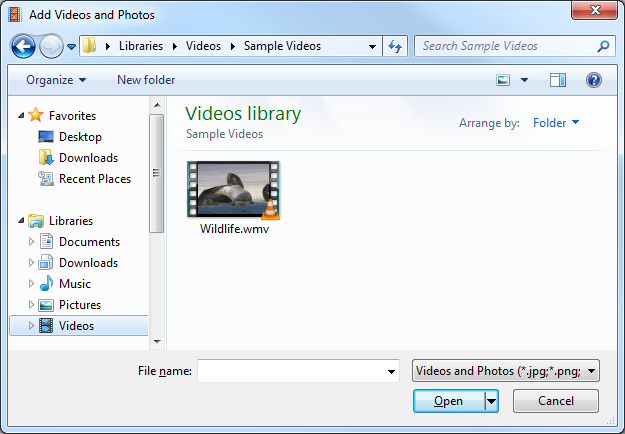
From here, if you have digital content, such as video files on a digital camera or SD card/memory stick, or have downloaded videos from iTunes or any other internet service, you can browse for this digital content by selecting Click here to browse for videos and photos. Locate and select the file you wish to edit first to add it to your track.
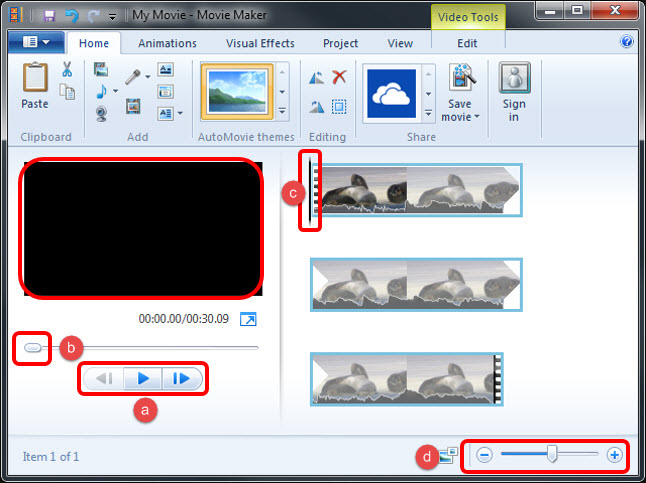
Once you’ve added your video file, a film strip will appear in the main area with a player screen on the left. You can play your video clip here with the play buttons (a) while the black scrub bar above (b) indicates where in the track you are. You can use the frame-forward and frame-back buttons to navigate frame by frame or drag the vertical bar (c) through the clip. You can also use the zoom bar at the bottom right (d) to take a closer look at your film strip.
You can also add still images, mp3s or in-line titles to give your movie more personality.
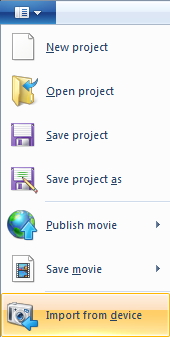 To capture from any input device, simply select the main dropdown menu at the top left of the menu bar and select Import from device.
If you are working in the ETC Video Lab in room B-23 of Alumni Hall, then you will have access the DVD-VCR in the lab, which should already be hooked up to the lab computer you’re using. It will read as Microsoft DV Camera and VCR.
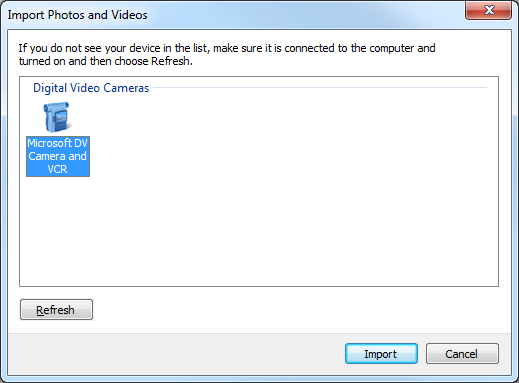
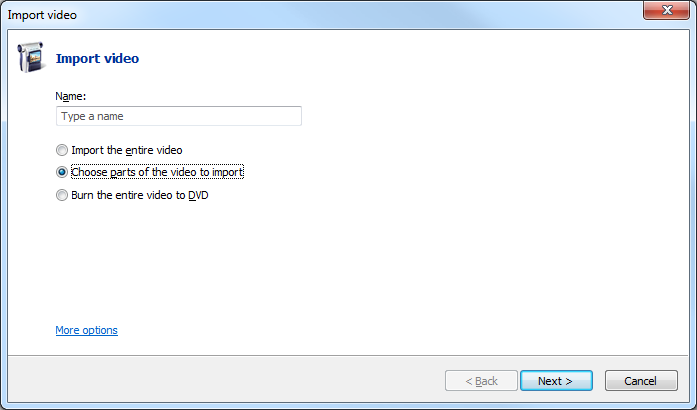
Once you’ve selected the input device, click Import. On the next screen, you will want to select Choose parts of the video to import. You can also name your first clip, but you can leave this blank, and have Windows name it with the date and time. Click Next when you’re done.
The next screen is where you’ll be recording your video. Whether it’s from a VHS or DVD, you will need to play through the clip you wish to copy in real time. Use the VCR remote to navigate just before the beginning of the clip you wish to record, and click Import. When you have reached the end of the clip, click Stop.
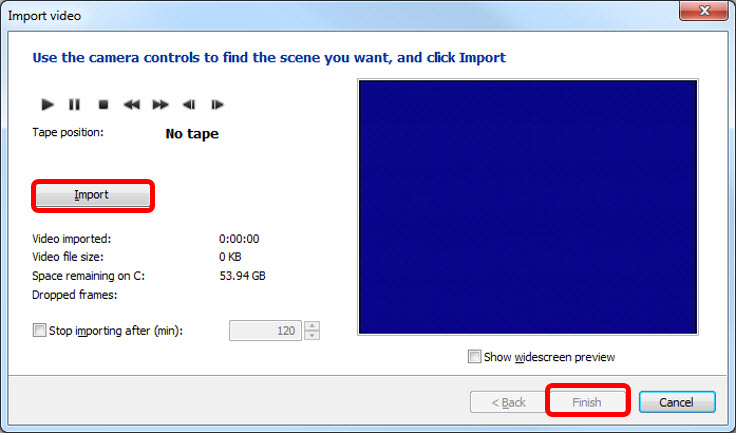
If you make a mistake and wish to re-record your clip, you can click Import again to try again. If you are satisfied with your clip, simply click Finish.
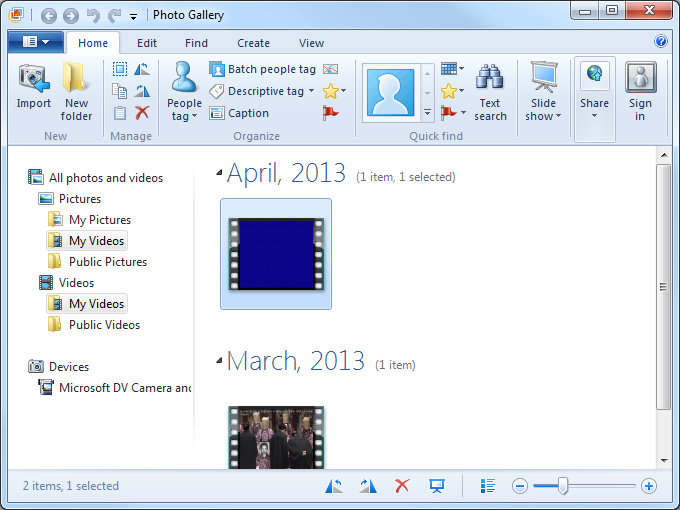
Your clip will be added to Windows Photo Gallery, which should open automatically. Click and drag your clip into Windows Movie Maker to begin editing your content.
The most common editing tool you will need is the Trim tool or the Split. Both can be accessed from the Edit tab of Movie Maker, and both perform the function of truncating any video clip in your track.

The black “scrub” bar in the center of the film strip below indicates where you are in your track, and the screen to the left of the track (not shown here) will show you what precise frame you’re looking at at this part of the track.
The simplest tool to truncate a video is the Split tool, which simply divides one clip into two at any point of your choosing.
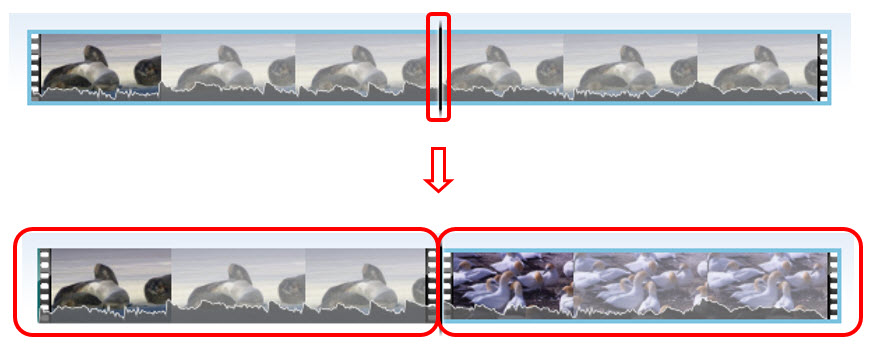
You can then edit either of these two clips independently from one another, or simply delete one of them and leave yourself only with the other.
The Trim tool will let you crop a smaller clip out of a larger clip, for instance when there is blank space on the front and tail end of your video clip, or if you only want to take a brief scene out of a larger video. Once again, the scrub bar and play, frame-forward and frame-back buttons can be used for precise navigation. You either can click and drag your start and end points, use the scrub bar and Set start point and Set end point buttons, or type the start and end point times in manually.
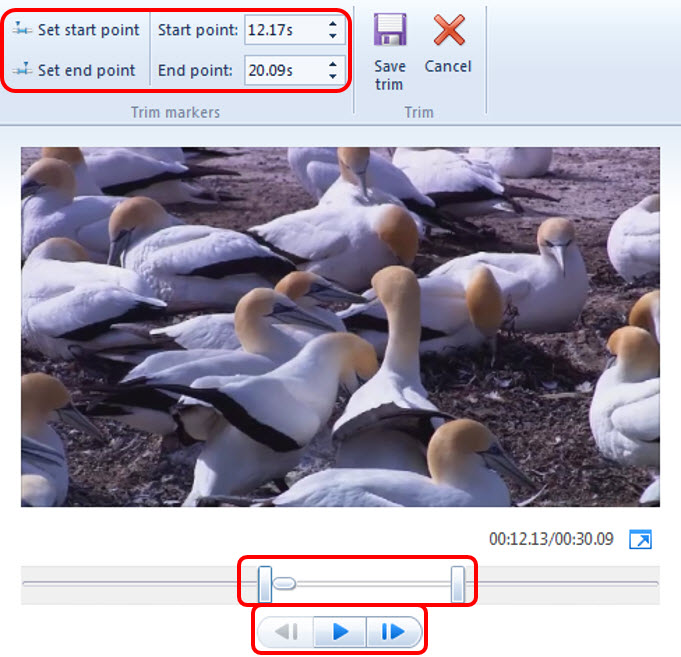
When you are satisfied with your trim, click Save trim to go back to Windows Movie Maker with your edited clip.
You can access other editing tools in the Animations and Visual Effects tabs. You can hover your mouse over these options to preview the effect on the main screen. Many faculty may find some of these effects beneficial to their video projects.
One useful effect, particularly when trying to place two disparate clips together, is the Blur effect, available in the Animations tab.

This will create a “fade from black” effect, which can make the beginning of a clip less abrupt, or soften the jump between two disjointed clips.
This animation is best used in conjunction with the Fade in: and Fade out: tools, which are available back in the Edit tab.

This will allow you to create the same effect with your audio as well as your video.
When clipping and combining multiple clips, especially clips from different sources, or even different parts of the same source, these two features are very useful for cleaning up the presentation and making the video feel more professionally done.
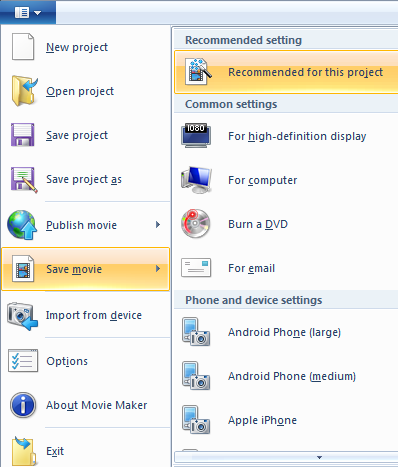 Once you have made all the edits you want to make to your video clips and are ready to put the finished result into a single video file, open your main dropdown menu and go to Save movie.
Here, you can choose which format you want your final video to be optimized for. If you want to burn your video to a DVD, you can select Burn a DVD. If you want to upload to a website such as Courseweb, you can select For email. If you’re not sure, you can simply select Recommended for this project to let Windows Movie Maker decide for you.
Whichever you choose, you will be prompted to name your video and save it to your computer.
Once you’ve decided on a name, click save and wait for the video to export.
That’s it! You’ve just made your video, and are ready to publish to the web or to a disk!
